Tuesday, August 21, 2012

Another Furniture Project

Enjoyed another busy weekend feeding my project obsession.  You see if
I don't complete some sort of project, I feel my weekend was wasted.       

This past weekend I decided to tackle the 3-drawer chest our neighbor gave us.  It had been sitting on the back porch for a while.


First I headed out to Lowes to pickup some stain and new knobs.  I purchased six 1.5 inch round wooden knobs and a quart of Sunbleached Rust-Oleum Wood Stain.


I went with plain wooden knobs since I planned on spray painting them green any way.


I then used my Black & Decker Mouse to sand down the existing finish.  Sadly my Mouse blew up before I could finish forcing me to finish sanding by hand.


This is what the dresser looked like after sanding.


I then applied the stain and topped it off with a coat of polyurethane.  I expected more of a gray like driftwood but ended up with more of a slate blue finish.


 Once I placed the dresser in my foyer though it actually looked good.  It picks up nicely on the color of the slate flooring in there.  The extra storage will be great and it is a handy place to lay down the mail too.


Sunday, August 12, 2012

Thrift Finds Transformed

Money has been tight of late so I had taken a break from hitting the yard sales and my favorite thrift and auction locales.  My addiction, however, could not be contained any longer.  Yesterday I headed out to check out some yard sales.  The weather was threatening though so I couldn't find as many as I would have liked.  That eventually led me to the next best thing, my local Salvation Army Thrift Store. 

At the first yard sale I stopped at I found this beautiful round end table for $5.00.  Well actually as you can see it wasn't really beautiful.  The shape and the simple danish modern lines totally caught my eye though.  The fact that it was made of solid wood and was sturdy sealed the deal.


I hunted high and low and found some stain I knew I had.  It was easy enough to find a sock with a hole in it to apply the stain.  On the first pass I forget to wear gloves so an SOS pad was needed to clean my hands when I was done.  As it was starting to get dark I let the table dry overnight.  This morning I sanded it a bit with fine sandpaper and applied a second coat of stain remembering to wear rubber gloves this time.  I gave the table some time to dry then I applied a coat of fast drying polyurethane using a paint sponge.


While I waited for the polyurethane to dry I decided to give the clear glass square-shaped vase I got for .49 cents at the Thrift Store a make-over of its own.


I turned the vase upside down on a newspaper and gave it two coats of Looking Glass Mirror spray paint.  The paint was leftover from a previous project.


If I do say so myself, I now have a stunning mirrored vase and an end table to die for.  Using leftover materials from other projects I only spent $5.49 to complete the two projects.  Note to self:  A hobby that allows me to flex my creative muscle and brings me so much joy can't be bad thing even if it is an addiction.

Sunday, May 27, 2012

Make your own Hanging Planters

The first year in my new house I bought hooks to screw into my front porch to hang planters from.    At a yard sale I found some wire hanging baskets.  I found ready-made planter pots at Lowes that fit in my baskets for that first year.  Last year and this though I used the old pots and filled them myself with my own plant selections.


You will need a bag of potting soil and some annuals to start.  I chose bright pink Begonia, and some lilac and white Impatiens.


I filled the bottom with some soil and then I placed the Begonia in the center of the pot.


I then encircled the Begonia with two white and two pink Impatiens.


After filling in around the plants with more dirt and giving them a good watering the final product looked like this.


Sunday, April 8, 2012

Make A Simple But Elegant Brunch

Easter morning and I had all kinds of ideas for a fancy Easter Brunch.  One big problem though is I am not much of a morning person.   That being the case breakfast items don't usually come out as planned.

I decided maybe I could prepare something not from scratch but serve it up elegantly to make up for my lack of skill.


I pulled a box of mini pancakes from the freezer, a carton of Cool Whip from the refrigerator, a jug of maple syrup from the cabinet and a banana from my banana rack.
   
 
 I put the pancakes on a paper plate and microwaved them for 30 seconds.


Then I put the pancakes in a fancy dessert dish and sliced up a banana on top.


I poured on some maple syrup.


I plopped on some whip cream.


Finally, I served it up in the middle of a fancy table setting with a cup of coffee and some hard boiled eggs sitting in bird nests.   Take if from me your guests will think you slaved to make them this beautiful and yummy breakfast.  What would have made the dish even more tasty would have been some crumbled bacon on top.  Maybe next time.

To convert this dish into a scrumptious and different dessert throw in some vanilla ice cream before you plop on the whip cream.  For breakfast or dessert you could also experiment with fruit flavored syrups.   Everything store bought and ready made and your guests will never know the difference.

Saturday, March 24, 2012

Simple Spring Wreath


I was late this year in taking down my Christmas Wreath.  I kept waiting for winter but it never came.  I finally gave up and started to look forward to spring.  Rather than buy a ready-made wreath or use last years I decided to make one of my own.


My local craft store had all of the necessary materials.  I picked up a 12" floral craft ring made from MDF, a bag of Spanish moss, two faux floral branches and a clip-on feather tailed bird.  Total material cost was about $13.

If you would like to make your own, follow along with me.

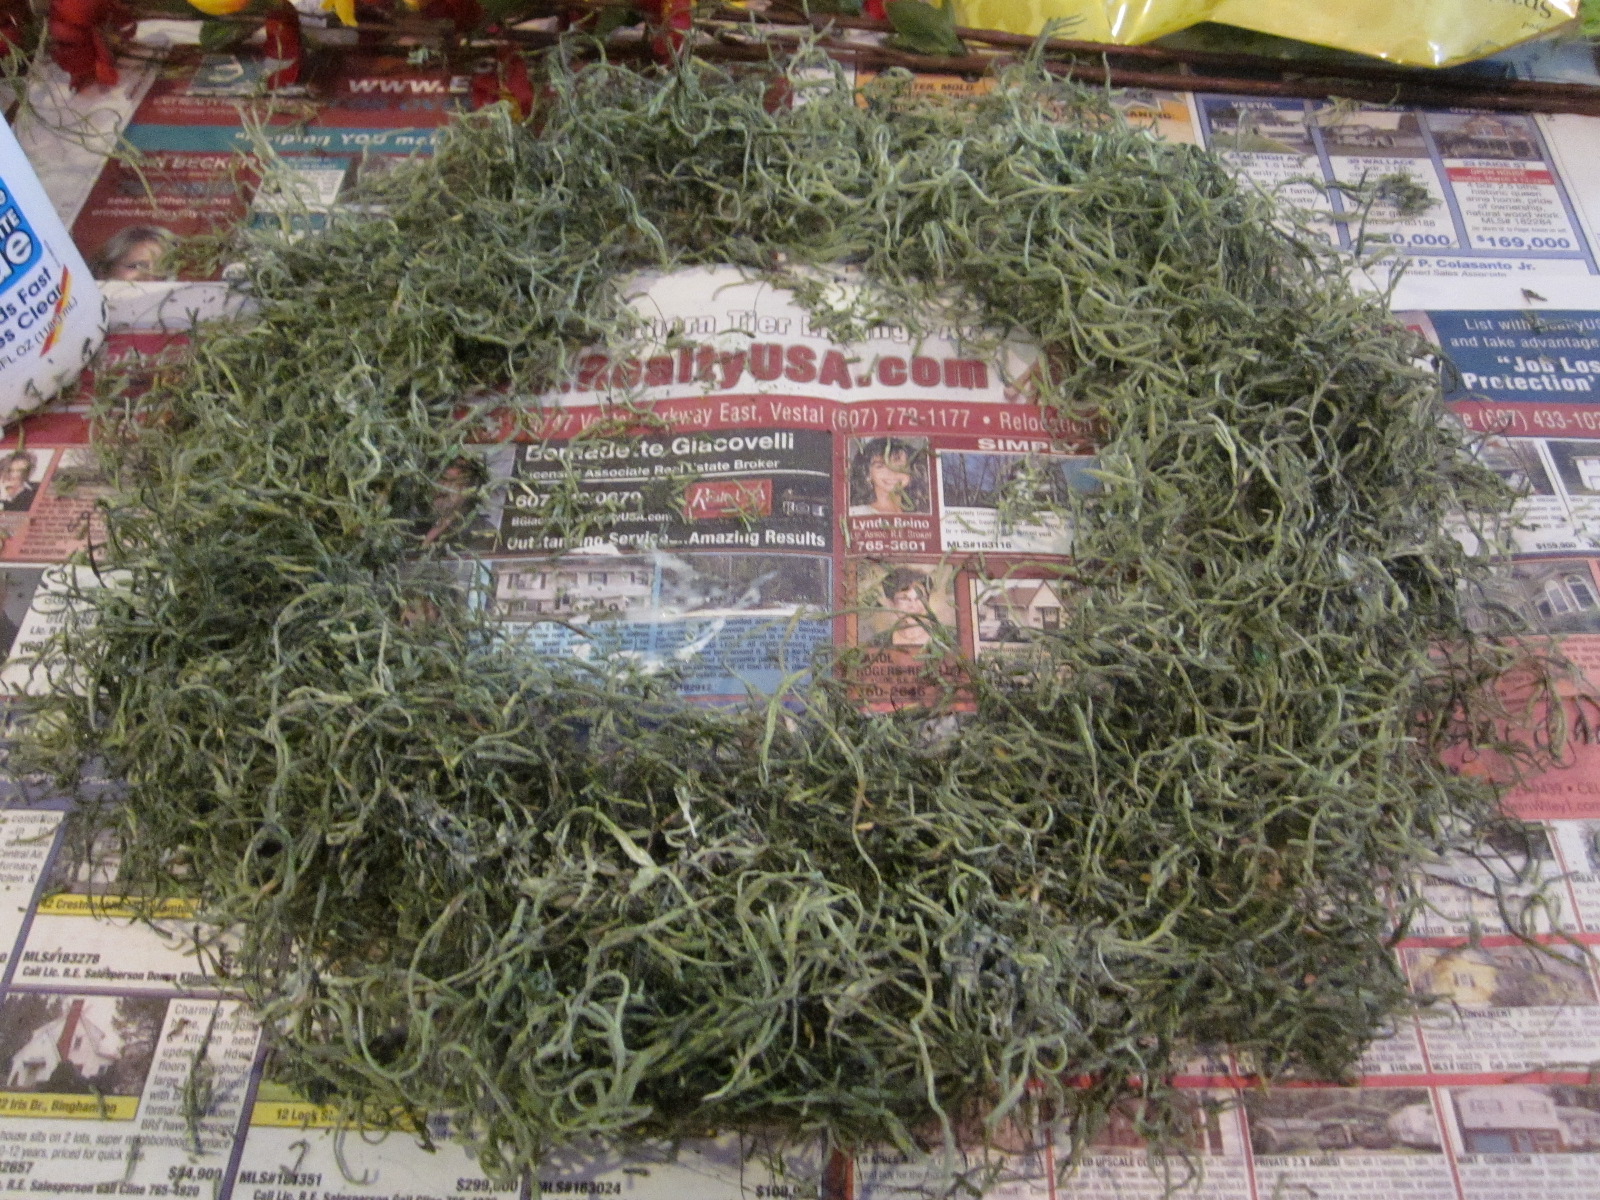
I started off by using Elmer's Glue to adhere the moss around the entire ring.  I love the curly texture of the Spanish moss. 


While the glue dried, I pulled the flower petals off the ends of the branches and arranged them around the ring.  Once I liked the overall look, I used my glue gun to secure each flower in place. 


Lastly I clipped the bird to the top of the wreath with its feathered tail hanging down.   I think the yellow and red flowers really pop against the rusty red of my front door.  As far as I am concerned there is nothing more welcoming than a hand-made wreath.


Friday, March 16, 2012

Painting Upholstered Furniture

Did you know you could spray paint upholstery?  It was a new idea for me.  I had dyed fabric before using RIT dye packets but that tactic obviously wouldn't work on furniture.  During one of my daily browses of the web I came across a spray painted wingback chair.  It actually looked really good so I decided to give it a try.  A while back I had purchased a barrell-shaped swivel chair at my local Salvation Army Thrift Store.  It was in good shape though a bit faded. 


I recalled reading that the paint could be found in craft stores.  So last Saturday I headed to JoAnn Fabrics.  I found a product called Simply Spray.  They carried it in 2.5 oz. spray cans.  I wasn't sure how much each can would cover but since they only had (3) packages of the Poppy Red that is what I got.  When I got home I carried the chair out into the back yard and began spraying.  After emptying the (3) cans I had only painted about half the chair.  Already knowing that JoAnn's didn't have more of the color I needed this time I headed to A.C. Moore.  There I picked up (3) more cans.  Sadly the paint was $1.00 more per can.   Once I got home I finished my chair and left it out to dry for a few hours.


I think the chair came out great.  The chair originally cost me $25 and for another $30 or so in paint I have a brand new chair.  If I had sent the chair out to be reupholstered, it would have cost me way more than that.  Below you can see the finished product in its final resting place in my living room.  The chair now matches my $5.00 vintage ottoman perfectly.  This was a really easy DIY project and one I would do again.

Thursday, March 8, 2012

Design Dilemma Solved With A Barn Door

Two years ago I purchased my current home.  It is an 1890 colonial.  The house appears to have been built in stages over the years.  The front third is 2 1/2 stories with high ceilings on both levels and a walk-up attic space.  The mid and rear sections are more of a 1 1/2 story.

The master bedroom is situated on the second floor of the mid section.  It is a very large room with sloped ceilings.  To enter from the hallway you need to step down.  When I purchased the house there was no door to this room making it more appropriate for use as a family room.  In order to convert the room for use as a bedroom adding a door was a must.


Herein is where the problems became apparent.  First of all being sunken a regular hinged door would have just hung in mid air along the wall.  With the door swinging into the room it either blocked the heat register on one wall or wouldn't swing all the way open because of the sloped ceiling.  A pocket door wouldn't have worked for the same reason.  Swinging the door out into the hallway would block the stairway or impede on the entrance to the other bedroom.  So what was a person to do.  I didn't want bi-fold doors which would have made it look like the entrance to a closet.  I needed something special.

I decided a sliding barn door was the only answer.  Looking into it further I found the standard barn door hardware to be relatively expensive.  For a lower priced option I came up with hanging a sliding closet door track on the outside of the bedroom wall.  I purchased a standard door slab at Lowes along with the closet door track and hardware.  In order to secure the track to the wall at the right height I secured a two by four painted the color of the wall first.  I then screwed the track into that and added the wheels to the top of the door.  It is functional and I think it added some industrial interest without compromising anything.  Wouldn't you agree?