Showing posts with label storage. Show all posts

Tuesday, January 15, 2013

An Ottoman Is A Must Have Item

If you haven't noticed, ottomans are everywhere.  It is not surprising since they have so many uses.  Of course, the original use for an ottoman was as a footrest.  You may also have heard an ottoman referred to as a hassock or pouf.  The ottoman originated in Turkey in the late 18th century.

In today's home décor ottomans make great accent pieces.  They can still be used as footrests, but are more often used today as additional seating, as coffee or side tables or to provide for much needed storage space.  Ottomans come in many shapes and sizes and can range in price from $100 to $1,000 or more.  Many DIYer's have even made their own ottomans out of plywood, foam and fabric.

Lets take a look at some of the stylish offerings available and see them in use.


These zebra ottomans would make great accent
pieces in any room.  They would look especially great
 as seating in front of a fireplace or
placed side by side at the end of a bed.


Here is an ottoman being used as a footrest. 
Paired with a matching side chair this
makes for a cozy reading area.


With the addition of a tray a large sturdy ottoman
makes a wonderful coffee table.


Ottomans also work well as space-saving
side tables in a small room.


This bench ottoman allows for storage of 
extra bed linens or off season clothes.


Storage ottomans can even be used to store
 files in an office space.


Here small ottomans tuck under a coffee table
when not being used for added seating.


Colorful Moroccan poufs make for fun
seating in a child's room.


So do you have an ottoman in your house?  How do you use yours? 

Tuesday, August 21, 2012

Another Furniture Project

Enjoyed another busy weekend feeding my project obsession.  You see if
I don't complete some sort of project, I feel my weekend was wasted.       

This past weekend I decided to tackle the 3-drawer chest our neighbor gave us.  It had been sitting on the back porch for a while.


First I headed out to Lowes to pickup some stain and new knobs.  I purchased six 1.5 inch round wooden knobs and a quart of Sunbleached Rust-Oleum Wood Stain.


I went with plain wooden knobs since I planned on spray painting them green any way.


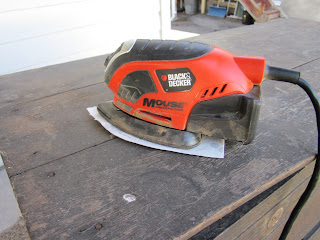
I then used my Black & Decker Mouse to sand down the existing finish.  Sadly my Mouse blew up before I could finish forcing me to finish sanding by hand.


This is what the dresser looked like after sanding.


I then applied the stain and topped it off with a coat of polyurethane.  I expected more of a gray like driftwood but ended up with more of a slate blue finish.


 Once I placed the dresser in my foyer though it actually looked good.  It picks up nicely on the color of the slate flooring in there.  The extra storage will be great and it is a handy place to lay down the mail too.


Sunday, November 20, 2011

Adding Kitchen Storage

My bad!  My blogging schedule seems to have gone out the window.  I have gotten busy with many projects and the upcoming holidays.  So to get back on track let me tell you about one of my latest projects.

A couple of weeks ago I spent a Saturday at my favorite auction house.  Instead of getting carried away as I sometimes do, I had only one thing on my list.  I decided my kitchen needed more storage.  One small corner remained underutilized.  It held only a big bag of dog food sitting atop a heating register. 


My hunt was for a tall skinny cupboard to fit the space.  This particular auction advertised many primitive cupboards and I found just what I was looking for in the project barn.  For $35 it was mine.  On my way home I stopped at Lowes to purchase the items I would need to update it.   A couple of cans of spray paint, some small bun feet and metal anchors for the bottom and I thought some new pulls.  Instead I decided to use the existing pulls but to paint them with leftover bronze paint I knew I had at home.  As the unit had previously been used as a built-in it was missing portions of molding at the top.  To address that I decided to buy all new. 

The next day I got down to business.  I screwed on the metal plates to attach the four bun feet to the bottom.  I added some nails to the back to secure it where needed.  I removed the pulls and spray painted the unit and the molding piece satin leafy green.  I spray painted the pulls in bronze and left everything to dry.

The hardest part of the whole makeover was cutting and mitering the molding for the top.  I used a miter box and a hand saw.  Then I secured the molding with small finish nails.  Once complete and ready to go, I had my significant other help me get it into the house.  It fit perfectly and with the feet it was high enough off the floor to allow the heat out into the room.  We secured the top of the cupboard to the wall so it wouldn't tip.

I wrapped wood-look shelf paper around the shelves and installed them at the appropriate heights.    I left space at the bottom so I could fit in the large bag of dog food.  I also found wire racks to hang on the doors for my plastic wrap and garbage bag storage.  This allowed me to free up a whole drawer in another cabinet.  Check out the finished project below.


Tuesday, October 11, 2011

Columbus Day Weekend Projects


I couldn't have taken off four better days weather wise.  I had big plans and many projects I intended to complete.  Saturday I did my usual yard sale shopping.  I don't know what I am going to do with myself when winter arrives and the yard sales go the way of the dinosaur at least temporarily.

A year ago I purchased a primitive style desk covered in many layers of paint at a yard sale.  I paid $5 for it.   With all of my other obligations it has sat in my garage since then.   This weekend I took it out and set my mind to completing its transformation.  I used paint stripper to take off what I could.  Then I sanded it down with my electric sander and course grit paper.  I spray painted it cream and added some nice deco style silver knobs to the drawer.  What a feeling of satisfaction.  To shed light on the situation I hung up a 1960's wicker swag lamp.

Moving my new gem to its spot in the corner of the Master Bedroom meant making space for it.  It gave me incentive to do much more.  I also moved in from the garage a mid century modern stand I bought at the Thrift Store a while back.  It too was only $5.  It needed just a bit of a wipe down and I added two storage baskets to the bottom shelf.   I made a wall unit out of it by combining it with a bookshelf I had found on one of my Auction House excursions.  I don't remember what I paid for it but I am sure it was cheap.  Above the wall unit hangs another yard sale find.  It is a Maio City Scene I found for $2.  To update it I painted the frame a nice glossy black.

 
At the far corner of the room sits my $12 recovered Estate Sale chair, $5 Thrift Store ottoman and $5 Flea Market floor lamp.  I can't wait to curl up in my new reading corner with a good book and a cup of coffee.  Maybe next time I take a few days off I will get to enjoy that pleasure.